This tutorial was originally published on Crafting a Green World in 2016.

If you've got something small that you want to show off, but don't want to get damaged, keep it safe AND on display. Make a treasure in a bottle charm out of it!
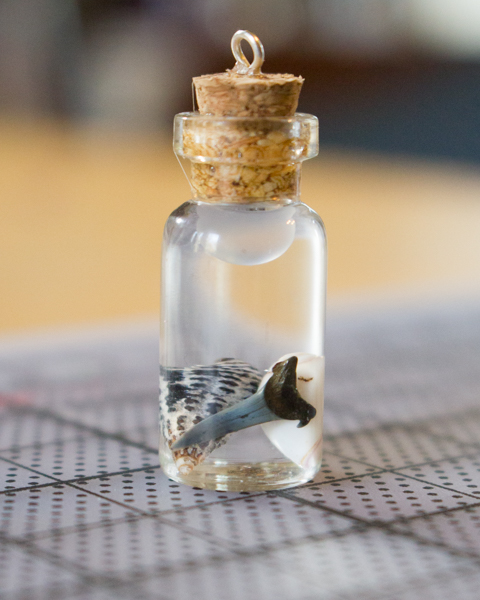
My kids and I have done this craft before with lots of little treasures, but on this particular occasion, we are going to make a treasure in a bottle charm or two out of some small fossilized shark teeth that we collected ourselves. We love fossils, and we love sharks, AND we love things that we do ourselves, so there's no way that we weren't going to show these beauties off!
Make a Treasure in a Bottle Charm
This project is a little unusual for me, as you do need a couple of special supplies that you likely can't upcycle or find in nature, so don't be afraid to spend a little time shopping around.
very small glass bottle. I prefer a real glass bottle--not plastic!--with a real cork. You may have to look around for this, as a lot of the jewelry findings that you'll come across will be plastic.
glycerin or sand. There are a couple of different ways to do this project, one with glycerin and one with sand. Beach sand will work unless you want to add water or oil to make the scene look like an ocean in a bottle; if you want a mini ocean, I have learned--
from experience!--that you really need to use clean
craft sand, not beach sand, alas.
treasures. We used a shark tooth plus a couple of tiny shells for each bottle.
eye pin. If you're going to keep your treasure in a bottle on a shelf, you won't need an eye pin, but if you want it as a charm or pendant, you'll need this plus a pair of jewelry wire cutters.
epoxy glue. My favorite is
E6000.
1. Thoroughly clean the glass bottle. You want the opening, especially, to be squeaky clean, as that's where the glue will adhere, but you'd be surprised how much dust can be found on the inside of a brand-new, unopened bottle, sigh. I use rubbing alcohol on a q-tip, but if you don't like to use rubbing alcohol, vinegar will also work.
2. Add your treasure. The most frustrating thing for my kids is the fact that the mouths of the bottles are so small that not every treasure will fit inside. If you're going to suspend your treasure in a bottle, you don't really want one that's very large, anyway, so just keep this fact in mind for the purposes of expectation management.
3. Fill the bottle up to the neck with glycerin. I use an eye dropper, and try (mostly in vain) to keep the glycerin from touching the inside of the neck. If you do drip--and you will!--wipe it down again with your cleaning solution.
If you've got shells in your bottle, it's a good idea to let the bottle rest for a day before the next step. The little air pockets in the shells will gradually work their way out, and if you don't want bubbles in your bottle forever, you want them to do this before it's sealed.
4. Glue the cork on. Put a small amount of epoxy glue around the outside of the cork, then push it into the bottle.
5. Cut an eye pin to fit. You don't want it to poke out of the bottom of your cork, so trim it with wire cutters.
6. Insert the eye pin. Again, put a small amount of epoxy glue around the outside of the eye pin, then push it into the center of the bottle.
This treasure in a bottle makes a lovely pendant for a necklace, but also a beautiful Christmas ornament, especially for a tabletop tree. I think it looks equally pretty, though, just sitting in a shadow box, ready to be admired by all who walk by!


