


This here is a VERY simple modification to add a balloon sleeve to the wonderful Wiksten Shift and if you are happy to break a few rules it is an alteration you can do with VERY little fabric!
I give this modification a big thumbs up in terms of joy, wearability and the feeling of swish-ness as you wear it. And people on the street like this top - which is always a sign.
Now firstly, to those of you who asked for this post a few weeks ago, my sincerest apologies. I tried to do it, got myself in a muddle, bejiggered it up and then couldn’t figure out how to explain around my mistakes. But today I decided I’d just lay it out for you again and take new photos. So this means there is two different colours in the photos and that is simply because of the bejiggered first version.

Things to note:
I made the top at the original version out of 1.15m (approx 1.25yards) of 135cm linen. I am guessing I purchased 1.2ish-m and there was a little shrinkage?
This meant that I got a top that was 53cm long with sleeves that were approximately 40cm long.
My sleeves ended up being about 60cm wide at the top and 54ish cm wide at the bottom.
The sleeves could be a little bit shorter and still look OK.
I cut a size 6 which was two sizes down from my measurements and there is still room to move. I think it is a good fit. Figuring out what size to make involved a bit of instagram wandering.
I’m guessing that this modification as it is shown in the pictures would work up until maybe a size 10 but then you would need more fabric.
A safe formula for figuring out how much fabric you would need for larger sizes would be twice your top length plus your sleeve length…. (if you are experienced at pattern Tetris you could probably get away with less by cutting on the short folds?).
PLEASE NOTE: that this won’t work if you have a directional fabric or fabric with a nap. The balloon sleeve will work but the tiny amount of fabric won’t.
And just to be explicit - normally I would iron my fabric before I cut things out. However, as I am simply laying this fabric/pattern out to take some photos for you tigers, I didn’t iron. A better blogger would probably have gone the extra mile but homeschooling kids who make pancakes and trash the kitchen have meant that I am at the “done is better than good” stage of life. Happy days? :)
Alrighty then. Enough with the chit chat, let’s get to it.
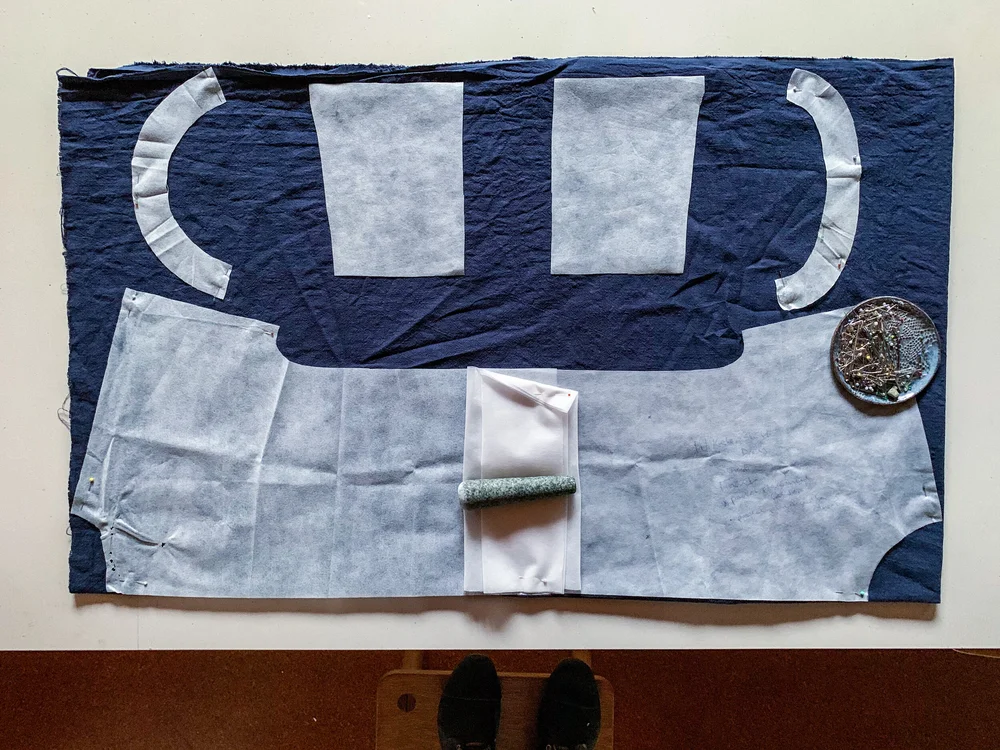
Step 1 - Lay Out The Front And Back
OK. So you need to fold your fabric in half, selvedge to selvedge. Then along the fold lay down your front and your back. Please note that it doesn’t matter where the front stops and the back starts as we are just cutting them out as one piece to maximise our fabric.
Because I have made the dress a few times I use the piece I traced out from the front and just roll up the excess pattern.
The magic of this pattern - in this hack - is that the front and the back are the same width which is how we maximise the tiny amount of fabric that we have.

Please Ignore the white line - that comes later. Please also ignore the holes in my back pattern piece near the neck. I burnt it with the iron and probably should cut another out …
Step 2 - Layout the rest of The pieces
So there actually are only five pieces to make this top.
A front
A back
A front facing (I cut mine out on the full just so this tutorial made sense.)
A back facing (I cut mine out on the full just so this tutorial made sense.)
A sleeve
The sleeve sits in the middle and then the facings are cut out at either end. PLEASE note that these facings are not cut out of both layers of fabric. They are really just on the pattern so we can make sure we have enough room for them.
One option if you are really struggling for fabric is to cut your facings out of a different fabric but make sure to under-stitch so they don’t pop out. Have a look at this brilliant grainline tutorial - it is for binding rather than facings but the same rules apply about under-stitching.
Step 3 - Modify the sleeve
The sleeve is the only thing we modify. And we do so by simply slicing it down the middle and spreading it out as the pictures demonstrate.
Our aim is to maximise the width of our sleeve while also getting a long enough sleeve. You can figure out what you need by
measuring - with your arm held out - your wrist to chest centre = X
measuring the front from the centre fold on the pattern to the armhole = Y
Taking X - Y = your desired sleeve length. So make sure that your sleeve pattern is this long, plus and minus any seam allowances.


The floor is dirty too :)

Step 4 - Use A Rule To Draw in Your Sleeve Piece
My aim was to maximise my length and my width while still having room for my facings so I drew out my sleeve using chalk as you can see below. By keeping the top of the sleeve near the selvedge you are able to get a wider sleeve.
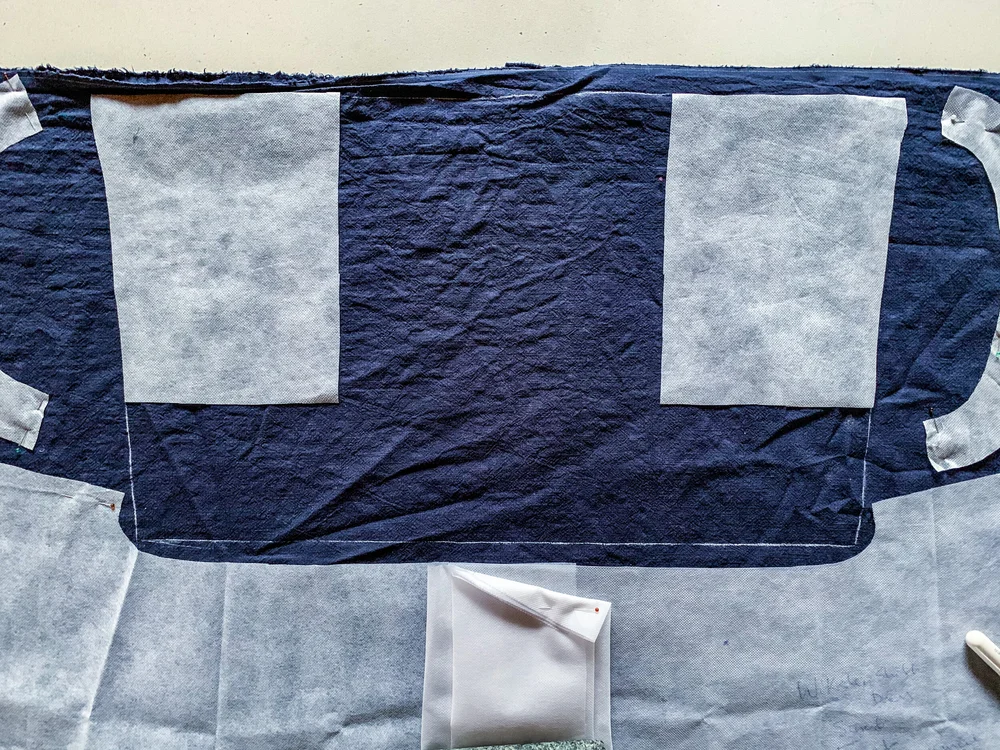
Step 5 - Cut out the Front And Back
Cut out the front and back in one piece.
Fold in half pinning the underarm and side seams together. The tops of the front and back might not meet and this is AOK.
Cut along the bottom to get two pieces.
The photos show what this looks like. Please note that this is on different fabric - this is the muddled up version.


Hoorah!
Step 6 - Cut out your sleeve.
Just cut along your chalk line….

Step 6 - Cut out your facings
Layout a single layer of an end and cut out your facings! And you are done. Other than the sewing that is.

Step 7 - The Sewing
So you sew it up as suggested with the only difference being the sleeve.
Simply gather the top of the sleeve before sewing it into the armhole. I do two rounds of basting stitch at 1.5cm and 6mm before sewing the the sleeve on with a 1cm seam allowance.
For the cuff;
Turn the bottom of the sleeve up 6mm and press.
Turn it up another 1.5cm and edgestitch leaving a small hole.
Insert elastic and then stitch the hole up.
yay!
I hope this is helpful and that your makes work out well. If I’m not being clear enough or if you have any questions, I’ll happily answer them in the comments.
If you are an instagrammer maybe give them a #wikstenshiftballoonhack so others can find them.
Enjoy
Felicia x